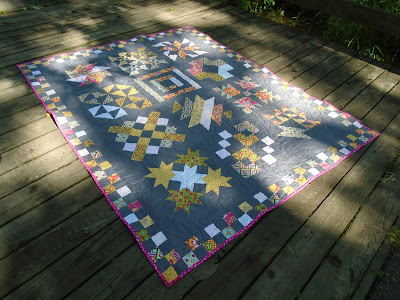
It's time for the big reveal!
For some reason I'm having trouble with my camera, so I will update this post tonight or tomorrow with my finished top. I put together diagrams of the throw and the twin sized quilts based on my colors but slightly modified so that those of you that tweaked your color schemes know how to split up your units.
And here we go!
Here's the throw size: (the baby size omits the last three rows of this version)
And here is the twin size!
I started designing this quilt by playing around with a traditional Storm at Sea quilt and changing out the larger square in a square in a square units for the pinwheel units. I think it looks particularly summery with the addition of the pinwheels while keeping the great angles and shapes of a traditional Storm at Sea Quilt.
Amanda is on vacation so the final PDF which will be updated to include all three blocks and the finishing directions will not be available until August, so until then, the directions to put together the top will be here on the blog.
The easiest way to put the blocks together is to sew together your Unit Bs (triangle in a square units) into pairs. If all of your Unit Bs are the same, just sew them into pairs with the "background side" along the seam so it looks like you are making large diamonds. If you used two different colors in your Unit Bs, sew them into pairs with two different colors.
Next, sew together four Unit Cs into a pinwheel shape -- your small triangles end up on the four outer corners of the pinwheel. If you used multiple fabrics in your large triangles of Unit C, group them together in fours so that your pinwheel is the same fabrics.
Now you'll start putting your rows together -- you will have "skinny" rows and "thick" rows. Your skinny rows will alternate between Unit A and the combined Unit Bs. The throw/baby row is shown first and the twin row is shown second.
For your thick rows, you will alternate between the combined Unit Bs and the pinwheel units. The throw/baby row is shown first, and the twin row is shown second.
Once you've made your rows, alternate between skinny and thick rows to build your final quilt!
I can't wait to see your finished quilts so don't forget to post your tops
in the Flickr group! If you have questions, don't hesitate to email me! Next month we'll have a quilt top parade and some free patterns to give away for those who post or email me pictures of their finished quilt tops or finished quilts!
PS. We are having
a sale on our Bear Tracks Pattern -- only $5 until July 12th!


