Monday, November 4, 2013

Starburst Quilt Along Week #2 -- Block #2 Introduction and Block #1 link-up

The Starburst Quilt Along is now over, but the entire pattern is now available for purchase.

Welcome back to the Starburst quilt along!

This one is also fairly simple. As usual, please make sure that you print it out full scale! See the brief printing directions here if you have an issue.

Here are my two blocks (please disregard the threads all over them, I'm not perfect!):


General Notes:
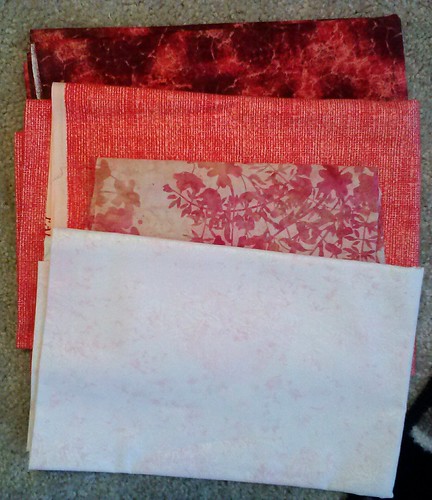
I picked two of my larger scale prints for the main fabric to show them off a little bit more.

One thing to note is that you can also deviate a little bit from the suggested numbering in many cases. For the center block, as long as you add the center fabric first, you can do the outer triangles in any order. The same thing goes for the outer center pieces.

I used smaller scrappy pieces for piecing the center blocks to save on fabric.

I will fully admit that I accidentally printed this pattern in the wrong size and had to remake the entire second block. I have a block that ended up about 8 3/4 inches instead of 9 1/2. I will probably use it on the back.

Good luck with Block #2! Head on over to the Flickr group to share your progress and ask questions!

Sunday, October 27, 2013

Starburst Quilt Along Week #1 -- Block #1 and fabric requirements

The Starburst Quilt Along is now over, but the entire pattern is now available for purchase.

Welcome to week one of our Starburst Quilt Along!

This pattern can be made into a wall hanging:


Or for as a throw sized quilt:


For your foreground fabric (fabric for stars themselves), most of the stars use 4 different fabrics. Amanda's quilt uses 4 different fabrics with very different intensities with a white background. All of the eight star points (that are a part of every block in this series) she used the medium orange fabric for.

Starburst fabrics

My quilt uses 9 different fabrics, some lighter, some darker, but some purple, blue, teal, and green on a black background.


We have a thread over on the Flickr Group for everyone to share their fabric pulls!

IMPORTANT NOTE: When you go to print your blocks, when your print screen comes up, make sure you click "actual size" under the scaling menu instead of "fit to page" -- otherwise your blocks will end up too small!! Double check yourself -- from dashed line to dashed line should measure 3 1/2 inches.


General Tips for Block #1:

Everyone finds their own "groove" when it comes to paper piecing techniques. If you're a newbie, I would suggest starting on the corner blocks first and then doing the center side blocks second.

When prepping your fabric to use for paper piecing it is easiest to cut strips or smaller chunks from your yardage to work with on your blocks. I typically cut 3 3/4 inch or 4 inch strips in this project -- that way if I wanted to cut a 3 1/2 inch square of the foreground fabric for a particular block (which you have in Block #1) you can do so from your pre-cut strips. 

The dashed line on the block template is the cutting line that includes the quarter inch seam allowance for when you sew your blocks together. 

Save your scraps! A few of the blocks later on will be able to use some pretty small pieces! I know that I jigsaw my fabric around so that I waste as little as possible. If you're just starting out, don't risk your fabric being too close to the seams and pulling apart -- no one wants that! Better to trim off the excess than to realize that you have to rip out that piece and start over!

I tore off my paper templates before I put my nine starburst units together. Some people don't do so until the block is finished (to help eliminate stretching along the bias). I find that it adds unnecessary bulk when sewing the rows together.

I sew my blocks together into three rows of three blocks and then sew my three rows together. I press my seams to one side and then alternate which way the seams face (both seams in, both out, both in, etc.) to have interlocking seams when I go to sew the rows together. I typically iron to whatever side is less bulky.

Here are my two finished Starburst #1 blocks:


Please comment here or on the Flickr group if you have any questions or comments! 

Go forth, and paper piece to your heart's content!

Saturday, October 26, 2013

October Stash Bee Blocks

Nothing like getting my blocks done under the wire!


The tutorial is over at the Stash Bee and it comes together VERY quickly!!

Thursday, October 24, 2013

Starburst Quilt Along -- Come join us!!!

The Starburst Quilt Along is now over, but the entire pattern is now available for purchase.

Starting October 28th!!


Together with Honey, Bunny, and Doll patterns, we are offering a FREE paper piecing pattern quilt along!

One star pattern will be released each week here at Little Bunny Quilts on Mondays. On the following Monday, you can link up your finished blocks!

You can make one of two sizes: a wall hanging with one of each of the 9 designs OR a throw size with two of each of the 9 blocks.

We also have a Flickr group to share progress!

Block talks and finished block link up dates
October 28th -- fabric requirements, intro to paper piecing, Block #1
November 4th  -- Block #2
November 11th  -- Block #3
November 18th  -- Block #4
November 25th -- Block #5
December 2nd -- Block #6
December 9th -- Block #7
December 16th -- Block #8
December 23rd -- Block #9
December 29th -- setting options -- final link up for finished blocks is in this post!

For those of you that link up all 9 or 18 finished blocks by January 15th, you will receive the setting directions FOR FREE from HBD Patterns!

Starburst Quilt Along

Tell your quilting friends -- this one's on us and we can't wait to share our patterns with you!


Monday, September 16, 2013