Showing posts with label placemats. Show all posts

Thursday, May 21, 2020

Ultimate Home Decor Blog Hop {Winter Forest Placemats + Giveaway}

Today is my day to share on the Ultimate Home Decor Blog Hop with Island Batik!


The collection that I have been sewing with is Winter Forest!


I have really enjoyed the fun wintry prints in this line!

Here are all of the fabrics in the bundle I received:


For my project, I cut 3.5" strips of each fabric to make strip pieced patchy placemats. I used the equivalent of 24 - 3.5" squares in each placemat top in a 6x4 arrangement.


I was actually able to cut enough from my strip sets to make six placemats plus a little extra! Here are the first four placemat tops sewn up and ready to be quilted!


For all of the placemats, I used the same light snowflake print for the backing and the blue bear paw print for the binding. For the quilting I used a light grey Aurifil thread to quilt meanders across each placemat. For the binding, I used the same grey thread in the bobbin, but used a cobalt blue 28 wt. Aurifil thread to do the final binding top-stitching.


While this set of wintry placemats won't get used right away, I definitely will be making more placemats this quick and easy way!

And now onto the giveaways! Hooray!

Island Batik is currently hosting *TWO* giveaways via Rafflecopter on their blog. Click here to visit their blog and enter! This giveaway closes TOMORROW, May 22nd.

I am hosting a giveaway of 5" strips of the Winter Forest line!


There are twenty 5" strips (one of each fabric in the line). As usual, leave comments for entries and make sure to complete all of the options for entries!

1. Leave one comment telling me your favorite line that has been featured in the Ultimate Home Decor Blog hop. All of the lines are featured in this blog post.

2. Leave me a second comment telling me if you follow Little Bunny Quilts/Honey, Bunny, and Doll Quilts and how you follow: this blog, our Facebook page, our Etsy page, our Payhip page, my Instagram profile, and our HBD profile.

3. For a super bonus third entry, tell me which of my other Island Batik projects from this year is your favorite:

Make sure to check out all of the other projects featured in the blog hop!

Wednesday, January 22, 2020

Blue Moon {Winter Blues Blog Hop}

Today I am participating in the Winter Blues blog hop hosted by Carla at Creatin' in the Sticks...


...and I am sharing a scrappy project for my Island Batik Ambassador project for January!

As an Island Batik Ambassador, I am provided with samples of various lines of Island Batik fabrics, Aurifil thread, Accuquilt products, and Hobbs Batting to use and share with you!


For my project, I decided to play with the scraps I had left over from the Starburst wall hanging I made for my August Island Batik Ambassador project. I had a quite a few of the 2.5" strips left over from the Sand Bar strip set and focused on using these for my project.


For a while, I have needed to make a new set of placemats -- one set that had six placemats instead of my usual four. Four is usually an easy number to make because you can use a single yard of fabric to back all four placemats and usually I don't need more than four. However, now that we are living in a house instead of an apartment (and I very much enjoy being the hostess with the mostest) I need at least one set of 6 placemats.

I used a modified version of the "jelly roll race" technique to make the base of my placemats. All together, I used about 20 strips. To begin, I sewed all but two of my 2.5" strips together on the diagonal (like you'd join binding strips) and pressed those seams open. I sewed my strip set in half three times so that my strip set was eight fabric strips wide and about 80"-85" long and then added one more 2.5" fabric strip so that my strip set was nine fabric strips wide. From there, I subcut my strip set in to six rectangles, 18.5" wide and 12.5" long.


Some of my subcut rectangles have more color changes than others, but this was much faster than trying to piece each one individually!

Next, I quilted each placemat -- I used two different fabrics for the backings, the navy/teal feather batik and the light blue cheerio print. I used the same teal variegated Aurifil thread as the top thread for all six placemats, however, I used a bunch of different colors in my bobbins to use up bobbin scraps! I used navy, emerald green, light teal, and even a bit of purple!


These pictures show the placemats before trimming -- I roughly cut the backing and the batting for each placemat before I quilted it. And in the effort of using scraps, I also used scraps of Hobbs batting left over from previous Ambassador projects in these placemats. I had some larger scraps that I used for four of them and then pieced scrap battings for the final two placemats.


Since I know these will be going through the washing machine and used repeatedly, I'm not too concerned about the backings not all being the same -- and the same for the binding! I used three different fabrics for the bindings. For placemats, I always sew my bindings completely by machine.


Now my table is ready for my next dinner party!


Make sure to check out all of the other bloggers hopping today and check out the full schedule on Carla's blog!

Wednesday, January 22nd


Thank you for visiting Little Bunny Quilts and please follow me in whatever way you prefer!

Tuesday, November 26, 2019

Easy Placemat Tutorials {Inspiration}

I am in full Thanksgiving prep mode -- and also working every day other than Thanksgiving this week -- so today I am doing a round up post of some of my favorite tutorials about placemats that are free! These are all quick and easy projects that you could potentially squeeze in before your Thanksgiving dinner if you're feeling ambitious.

Jet Setter Placemats: These placemats were made with yardage and precuts, but the small squares could easily be cut from scraps!


Bunny Patch Placemats: These are my favorite to use at home! These were made from 10" squares but could easily be made from your favorite yardage.


Chit Chat Placemats: These only use 3.5" squares and yardage, so this is another great project for scraps!


Finally, last year I made some placemat sets to donate to a fundraiser. The first set used the Bunny Patch Tutorial with Valentine's candy fabrics.


Have a wonderful Thanksgiving and I'll be back next week! I am looking forward to starting the Frolic mystery quilt on Friday!

Monday, November 19, 2018

More Bits and Pieces {Scrappy Sewing}

To follow up from my scrappy table runners from last week, here are the scrappy placemats that I made!

My first set of placemats is also Christmas-y, with various greens and the large scale box print in Christmas colors that I used on the back of my Fire Pit Christmas quilt.


For the backing, I had a red tonal print in my stash that I had originally planned to use but I had to stop at my LQS on Saturday anyways, so I picked up a yard of this fun holiday animal print on clearance to use for the backing of these placemats. I did a loop-and-stars filler for the quilting in red Aurifil thread. I also used the same box print to make bias binding for each mat.


The second set of placemats is made from the remainder of the layer cake that I had originally used to make a Valentine's Day themed table runner. I used my Bunny Patch placemats tutorial to cut the layer cake squares into pieces for the pieced "backing" and the 6-patch "front". I did the quilting in red Aurifil thread and did a swirl-and-hearts motif. The binding is a dark red tonal print with gold metallic accents from my stash.


I ultimately decided to skip the applique addition on these since the prints speak for themselves!


My church ladies were SO excited to get some additional items donated for the craft table. Quite a few of them are also quilters and sewists, but they were rather impressed with my FMQ skills!

I'm hoping that I can continue to make a few more items between now and mid-December to add to the table, provided these ones sell! And of course, I hope that the place mats and table runners find good homes!

Happy Monday! Voting closes tomorrow in the Tips and Tutorials festival, so vote for your favorites to win one of the sponsored prizes!

Sharing at Oh ScrapLinky Tuesday and Brag About Your Beauties!

Tuesday, September 11, 2018

Words to Live By Blog Hop with Benartex {Chit Chat Placemats Tutorial}

Today I'm your host for the Words To Live By Blog Hop with Benartex!


This new line designed by Cherry Guidry is a fun combination of prints, including text, keys, and daisies!

I'm always looking for new ideas for quick and easy projects like table runners and placemats that are easy gifts. These kinds of projects are perfect for using batting scraps too! I decided to make some simple placemats using 3.5" squares using these fabrics. Let's get sewing!


Yardage required:

2/3 yard background fabric -- I used Modern Lace White
1/2 yard total accent fabrics -- I used four different fabrics -- Happy Medallion Yellow, Daisy Turquoise, Tiny Words Red, and Keys Charcoal
1 1/2 yards for backing and binding -- I used Trellis Grey

From the background fabric cut:
Four (4) 12.5" x 9.5" rectangles
Eight (8) 12.5" x 2" rectangles
Sixty-Four (64) 2" squares

From your accent fabrics cut:
Thirty-Two (32) 3.5" squares TOTAL (I cut eight from each of my four colors)


From your backing and binding fabric cut:
Eight (8) 2.5" x WOF strips
Four (4) backing rectangles approximately 15" x 20"
Note: If using one fabric for your backing and binding, cut your binding strips first from your 1.5 yard cut of fabric, then cut your remaining fabric (approximately 34" long) into four quarters for your four backing pieces.

To opposite corners of each 3.5" square, use the stitch and flip method to add a 2" background square to the opposite corners. Some people call this unit a "half snowball" some people call it a "pop bead" -- whatever you might call it, you'll need eight of them for each placemat and 32 if you're making a set of four placemats like me.


Sew your pop bead blocks into sets of four, making eight sets of block strips. Since I am using four different colors, each of my sets has one of each color. I made half in one pattern and half in a second pattern.


Arrange two 12.5" x 2" rectangles, two pop bead block strips, and one 12.5" x 9.5" rectangle as shown below. Sew together to complete the top of your placemat. Make four placemat tops, which should measure 12.5" x 18.5".


Quilt as desired and bind.


Thanks for allowing me to share this quick and easy tutorial! This would make an easy gift and a great way to use some of those seasonal fabrics that you always have hanging around in your stash!

Now for the giveaway! Enter to win a set of 8 fat quarters of this fabric line! Comments for entries:

--Leave a comment and tell me your favorite type of quick-and-easy quilting and sewing projects.

--If you follow me in some form or fashion, leave a second comment. (Facebook, Instagram, Bloglovin, Etsy, or whichever way you prefer!)

--If you follow Benartex fabrics on Facebook or Instagram, leave a third and final comment.

Giveaway will close at midnight on Sunday, September 16th. Thanks for visiting and check out the other posts on this hop!

Congrats to our winner, Lisa Marie!


Words to Live By Hop Schedule:
Tuesday: Alison @ Little Bunny Quilts
Thursday: Carol @ Just Let Me Quilt

Monday, July 30, 2018

Fall in Love {Fall and Halloween Patterns!}

With all of the back-to-school sales and supplies popping up in all of the stores, it made me think about all of the fun fall and Halloween patterns we have in the HBD shop!

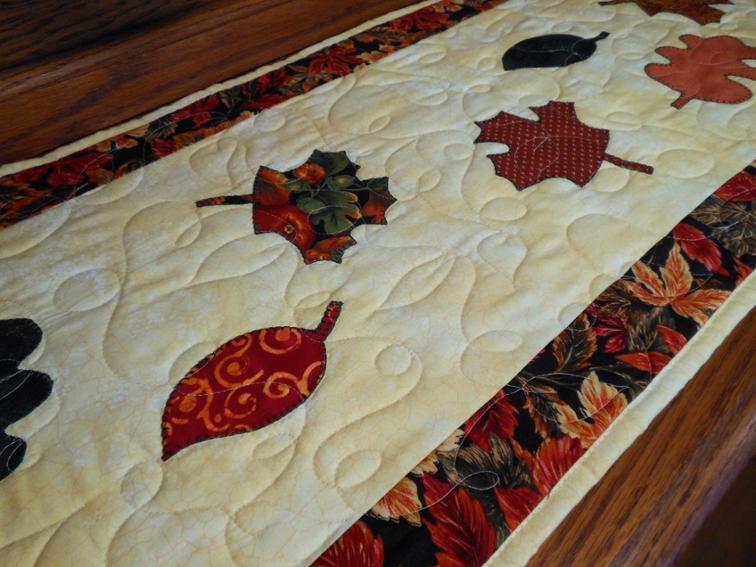
Love fall leaves? Our Seasonal collections have you set! The Seasonal Placemats set #3 and Seasonal Table Runners set #3 each have a fall leaves pattern.


Seasonal Placemats set #2 and Seasonal Table Runners set #2 have a Halloween candy corn pattern!


We also have the Candy Corn Placemat KIT that includes the pattern for Seasonal Placemats set #2.


More into ghosts and ghouls? Check out our Halloween Spooks pattern -- perfect for a table runner or a wall hanging and includes SIX different Halloween applique motifs for you to pick and choose your favorite designs.


And if all of this applique isn't your thing, we also have our Log Cabin Pumpkins table runner!


Don't forget to join our HBD Quilts Facebook group for tips, tricks, sale previews, and more!

Thursday, February 1, 2018

Jet Setter Placemats {Wonderlust Blog Hop + Giveaway}

Today I'm your host for the Wonderlust hop and I've put together a tutorial for placemats that can be made with yardage, precuts, or scraps!


Wonderlust is a beautifully rich fabric line -- with some stunning prints and tonals! The Marbella prints would be beautiful in a rainbow quilt.


Let's get sewing!

For these placemats you'll need:

Precut or scraps of your choice (I used a 10" stacker of Wonderlust)
2/3 yard black (I used the Marbella black print)
1/2 yard for binding (I used the blue Electric Slide print)
1 yard for backing (I used Good Vibrations print)


From your black (or background) fabric, cut the following for four placemats:
Four (4) rectangles 10.5" x 4.5"
Eight (8) strips 14.5" x 2.5"
Eight (8) strips 12.5" x 2.5"


Since I cut my focal fabrics from 10" stacker squares, I cut eighteen (18) 10" x 2.5" strips. 


Sew together your strips into two sets of five (5) strips each and two sets of four (4) strips each. 


Crosscut each strip set into four (4) sections 2.5" across. You will need a total of eight (8) units with five squares each and eight (8) units with four squares each.


Layout one large rectangle and four strip set units as shown below. Sew the five-color strip sets to the top and bottom of the large rectangle and then sew the four-color strip sets to the sides of the unit.


Add the 14.5" long strips to the top and bottom of each unit and add the 12.5" long strips to each side.


Quilt as desired and bind. I used black thread and did simple loops on each placemat. You'll need two WOF strips to bind each placemat. I used the Good Vibrations print as my backing and the Electric Slide print as my binding.


This is a fun and easy pattern that can easily be adapted to scraps (each placemat needs 18 2.5 inch squares if you don't want to strip piece your sections) or other types of precuts. You could also use only two or three different fabrics for your ring of squares for an alternating pattern instead of the somewhat random pattern that I used here!


I like these placemats so much, I might have to make myself a matching table toppers for my two end tables. And maybe some mug rugs. And maybe even another Pocket Hanger wall hanging. My husband is going to laugh at me, guaranteed, but he'll probably appreciate being able to swap out the purple and pink quilted coasters we currently use!


Thanks to Benartex for asking me to be a part of this fun hop!


Interested in snagging a few fat quarters of Wonderlust for yourself? Leave comments to enter!
1. Leave a comment telling me your favorite print in the Wonderlust line.
2. If you are a follower of Little Bunny Quilts, leave me a comment with how you follow! (PS. don't forget to join our HBD Quilts Facebook group to stay informed about our soon-to-be announced quilt along!)

I will pick a winner on Monday, February 5th. Make sure that you are not a no-reply blogger or else I will not be able to contact you!

Update: the giveaway is now closed and Brenda is our winner!

Sharing at Finish it up Friday!