Showing posts with label QCQAL 2. Show all posts

Thursday, September 15, 2016

Finished Wallflowers Row Quilt

This is one of those "long time coming" finishes! This is my (finally) finished quilt from the Quilter's Choice QAL that I hosted last year. You can click here and see all of my posts and tutorials!

My quilt is twin sized and uses the Wallflowers line by Allison Harris of Cluck Cluck Sew. 


There are three 12" block rows, three 8" block rows, two 6" block rows, and three 4" block rows. Between each row and along the sides there is a 1" finished strip of white fabric.

]

This quilt was quilted professionally, and each row is a different (yet similar/related) motif -- lots of different sized loops and swirls! It is a little hard to see in the pictures but I love it!


(Accidental shoe picture!)


The backing and binding is 108" extra wide backing in a green tonal floral.


I am just in love with this quilt and am kind of sad that I don't have a twin bed to put it on!


I entered this quilt (along with my Candy Shop quilt and my Wishes quilt) into our county fair and I will hopefully find out soon if I won any ribbons!

Hop on over to Craftsy to get your FREE row quilt pattern!


Sharing at Finish it up Friday, Fabric Tuesday, Sew Cute Tuesday

Friday, April 22, 2016

HBD Designs: Made by YOU!

One of the most exciting things about being a pattern designer is seeing people make quilts from your designs! Today I wanted to share a few quilts made by you inspired by our patterns!

First, we have Debra's Starburst Quilt. She participated in our original quilt along and here is her finished quilt!

Next we have Jordan's version of Square Pegs. She made an ombre effect quilt!


Finally, I wanted to share a few quilts made by my mom (the Honey of HBD!) who is always willing to play along with our quilt alongs and new patterns! She is the official pattern tester of HBD. :)

First we have her QCQAL quilt from 2014:


Next we have her QCQAL 2 quilt from 2015:


And finally her Spring Splendor quilt -- with a candy pink background!


If you've made a version of one of our patterns, please share it! You can email us pictures at honeybunnyanddoll@gmail.com or littlebunnyquilts@gmail.com!

Monday, July 6, 2015

QCQAL 2: Finished Quilt Top Tips and link up!

We've reached the end of the road!


Here are a few tips and tricks for putting together your finished quilt:

1. You will more than likely need to play around with your layout. You want to mix up your sizes of rows and make sure that your fabrics are mixed up as well! I would suggest starting out your rows in the same size order as mine, and then move around as needed!

2. I sewed the sashing strips on to the bottoms of all of my rows, then sewed together in pairs, and then sewed the pairs into pairs, etc. until the whole quilt was sewn together.

3. I think my quilt is just a touch on the short side, so I may add another row to the bottom. Bonnie, one of our participants used 2 inch sashing instead of 1 inch sashing, so hers is nice and long! (pictured below!)

And drum roll please!


(Of course, now that I am looking at the pictures, it looks much less square than when I was working with it at home!)

For clarification my row order is: 8 inch, 4 inch, 12 inch, 6 inch, 4 inch, 8 inch, 12 inch, 6 inch, 4 inch, 12 inch, 8 inch
Hopefully this will help some of you in figuring out how to lay your rows out!

Note: for those of you that have made the throw size and have two of each size row, you can skip the top three -or- the bottom three rows on my quilt since you have 8 rows instead of 11!

Here are two close ups of different sections of the quilt:


Bonnie got hers done this weekend and was kind enough to send me a picture! As I mentioned above, she used two inch sashing instead of one inch sashing.


Her row order is 8 inch, 4 inch, 12 inch, 6 inch, 12 inch, 8 inch, 4 inch, 6 inch, 12 inch, 4 inch, 8 inch.

And it is now your turn to share whatever you have finished -- blocks, rows, or finished quilt tops! In two weeks I'll have a "quilt parade" post of all of the finished tops!

Sharing at Sew Cute Tuesday, Building Blocks Tuesday (guest host Patch + Dot!), Linky Tuesday, and Fabric Tuesday!


Monday, June 15, 2015

QCQAL 2: Row #8 -- Pop Beads

Welcome to the LAST tutorials for our Row Quilt QCQAL! I can't believe how fast this has gone by (again!) and that we're almost done with these beautiful quilts! Our next post will be on July 6th to talk about joining rows and finishing the quilt top.


Today, we're making a row of pop beads for our second 4 inch row. For one block you will need:


For a throw quilt you will need:
Twelve (12) 4.5 inch squares
Twenty four (24 2.5 inch squares

For a twin quilt you will need:
Eighteen (18) 4.5 inch squares
Thirty six (36) 2.5 inch squares

Draw a diagonal on each of your background squares and align each one with opposite corners of your 4.5 inch square. Sew each background square to the 4.5 inch square on the diagonal line. 


After sewing on each of your background squares, trim 1/4 inch away from each seam.


Press and your finished block will look like this:


I have yet to make my third 4" row -- people making the twin sized quilt, don't forget! -- but here are all of my rows thus far!


Now it's your turn to share your blocks! This week feel free to share anything you have finished up to this point! On July 6th, we'll have a link up for finished tops and for rows. This link up is going to be open until July 5th, so you have lots of time to work on your rows and get caught up!

PS. Don't forget to follow Honey, Bunny, and Doll on Pinterest!

Sharing over at Linky Tuesday, Fabric Tuesday, and Building Blocks Tuesday!


Monday, June 1, 2015

QCQAL 2: Row 7 -- Broken Dishes

This is the second to last week! Holy wow! This week we are making Broken Dishes blocks for our first 4" row. This is a good block if you have lots of scraps left as we draw near to the end!


For the throw sized quilt you will need to make 12 units and for the twin sized quilt you will need to make 18 units.

For one unit:


For a throw sized quilt you will need:
Twenty four (24) 3 inch background squares
Twenty four (24) 3 inch squares

For a twin sized quilt you will need:
Thirty six (36) 3 inch background squares
Thirty six (36) 3 inch squares

Pair up each colored square with a background square and make HSTs. You will need four (4) HSTs per block.


Sew together as shown, and repeat until you have your desired number of units!


We can't wait to see what your blocks look like!

Sharing at Linky Tuesday and Fabric Tuesday!

PS. Don't forget to follow Honey, Bunny, and Doll on Pinterest!

Monday, May 18, 2015

QCQAL 2: Row 6: Birds in the Air and 6 inch row link-up

It's time for Row #6! This time we are making Birds in the Air blocks. Don't forget to come back and link up pictures of your 6 inch block rows (and your other rows if you haven't done so already!)


Because this block uses an odd number of "parts," this tutorial (unlike the rest in this series) is written to make a pair of Birds in the Air blocks. For a throw sized quilt you will need to make 8 blocks (4 pairs) and for a twin sized quilt you will need to make 12 blocks (6 pairs).

For two blocks, you will need:
One (1) 6 7/8 inch square cut diagonally once (yielding 2 triangles)
Three (3) 3 inch squares for HSTs
Three (3) 3 inch background squares for HSTs
Three (3) 2 7/8 inch background squares cut diagonally once (yielding 6 triangles)


For a throw sized quilt you will need:
Four (4) 6 7/8 inch squares cut diagonally once (yielding 8 triangles)
Twelve (12) 3 inch squares for HSTs
Twelve (12) 3 inch background squares for HSTs
Twelve (12) 2 7/8 inch background squares cut diagonally once (yielding 24 triangles)

For a twin sized quilt you will need:
Six (6) 6 7/8 inch squares cut diagonally once (yielding 12 triangles)
Eighteen (18) 3 inch squares for HSTs
Eighteen (18) 3 inch background squares for HSTs
Eighteen (18) 2 7/8 inch background squares cut diagonally once (yielding 36 triangles)

Using your 3 inch squares, make HSTs pairing together your focus and your background fabrics. Trim to 2.5 inches. For each pair of blocks you will make 6 HSTs -- 3 HSTs for each block.


Lay out your block as shown below.


Sew together your small triangles and HSTs together to form a larger triangle unit. I found it easiest to sew the three HSTs and the center triangle together like a four-patch and then to sew the other two triangles on. Remember to watch your triangle and HST orientation and to trim off your dog ears as you go!


Sew your large triangle to your HST/triangle unit to finish your block.


I made my blocks in three different colors -- four in each color. Here are all 12 of my blocks.


(Note: for those of you making twin sized quilts, you do not need to make a third 6" row -- you only need two!)

Link up your 6" block rows!

Monday, May 4, 2015

QCQAL 2: Row 5 -- Pinwheel Star

We are halfway though the QAL already, how did that happen?


This week we're going to be making pinwheel star blocks! This is a block with a lot of variations -- the way you choose to color it will determine what your final block looks like! This block is entirely half square triangles -- and small ones at that -- so it might be best to work on this one in small batches as to not drive yourself batty.

Remember that you will need to make 8 blocks for a throw and 12 blocks for a twin sizes quilt!

For one block you will need:


For a throw sized quilt you will need:
Thirty two (32) 2.5 inch squares in pinwheel color A
Thirty two (32) 2.5 inch squares in pinwheel color B
Sixty four (64) 2.5 inch background squares

For a twin sized quilt you will need:
Forty eight (48) 2.5 inch squares in pinwheel color A
Forty eight (48) 2.5 inch squares in pinwheel color B
Seventy two (72) 2.5 inch background squares

This block is highly reliant on making accurately sized HSTs! Do not forget to trim!

Pair up each colored square with a background square and make HSTs. Trim each HST to 2 inches square. For each block you will need eight (8) background/color A HSTs and eight (8) background/color B HSTs.


Lay out as follows and sew together.


And here's my finished block!


And here are all 12 of my pinwheel star blocks!


See you in two weeks for our next tutorial!

Monday, April 20, 2015

QCQAL 2: Row 4 -- Crystal Star Tutorial and 8 inch row link up

Yay, finally a star block!

This is a cute block and a good one to use with fussy cut centers. I used the same fabric for the center of all nine of my blocks, but then alternated what the outer colors were for the triangles, so I ended up with 5 blocks with one color placement and 4 blocks with another.

Here's what you need to cut for one block:


For a throw sized quilt you will need:
Six (6) 3 3/8 inch squares
Twelve (12) 3 inch squares, each cut diagonally once
Twenty four (24) 2 7/8 inch squares
Six (6) 5 1/4 inch background squares
Twenty four (24) 2 1/2 inch background squares

For a twin sized quilt you will need:
Nine (9) 3 3/8 inch squares
Eighteen (18) 3 inch squares each cut diagonally once
Thirty six (36) 2 7/8 inch squares
Nine (9) 5 1/4 inch background squares
Thirty six (36) 2 1/2 inch background squares

Using your cut triangles and your 3 3/8 inch squares, sew a triangle on to each side of the square as shown below to make a square in a square unit. Your square-in-a-square units will need to be trimmed to 4.5 inches and make sure to center your square when you do so! It is also helpful to trim off your "dog ears" as you go as well to prevent bulk.


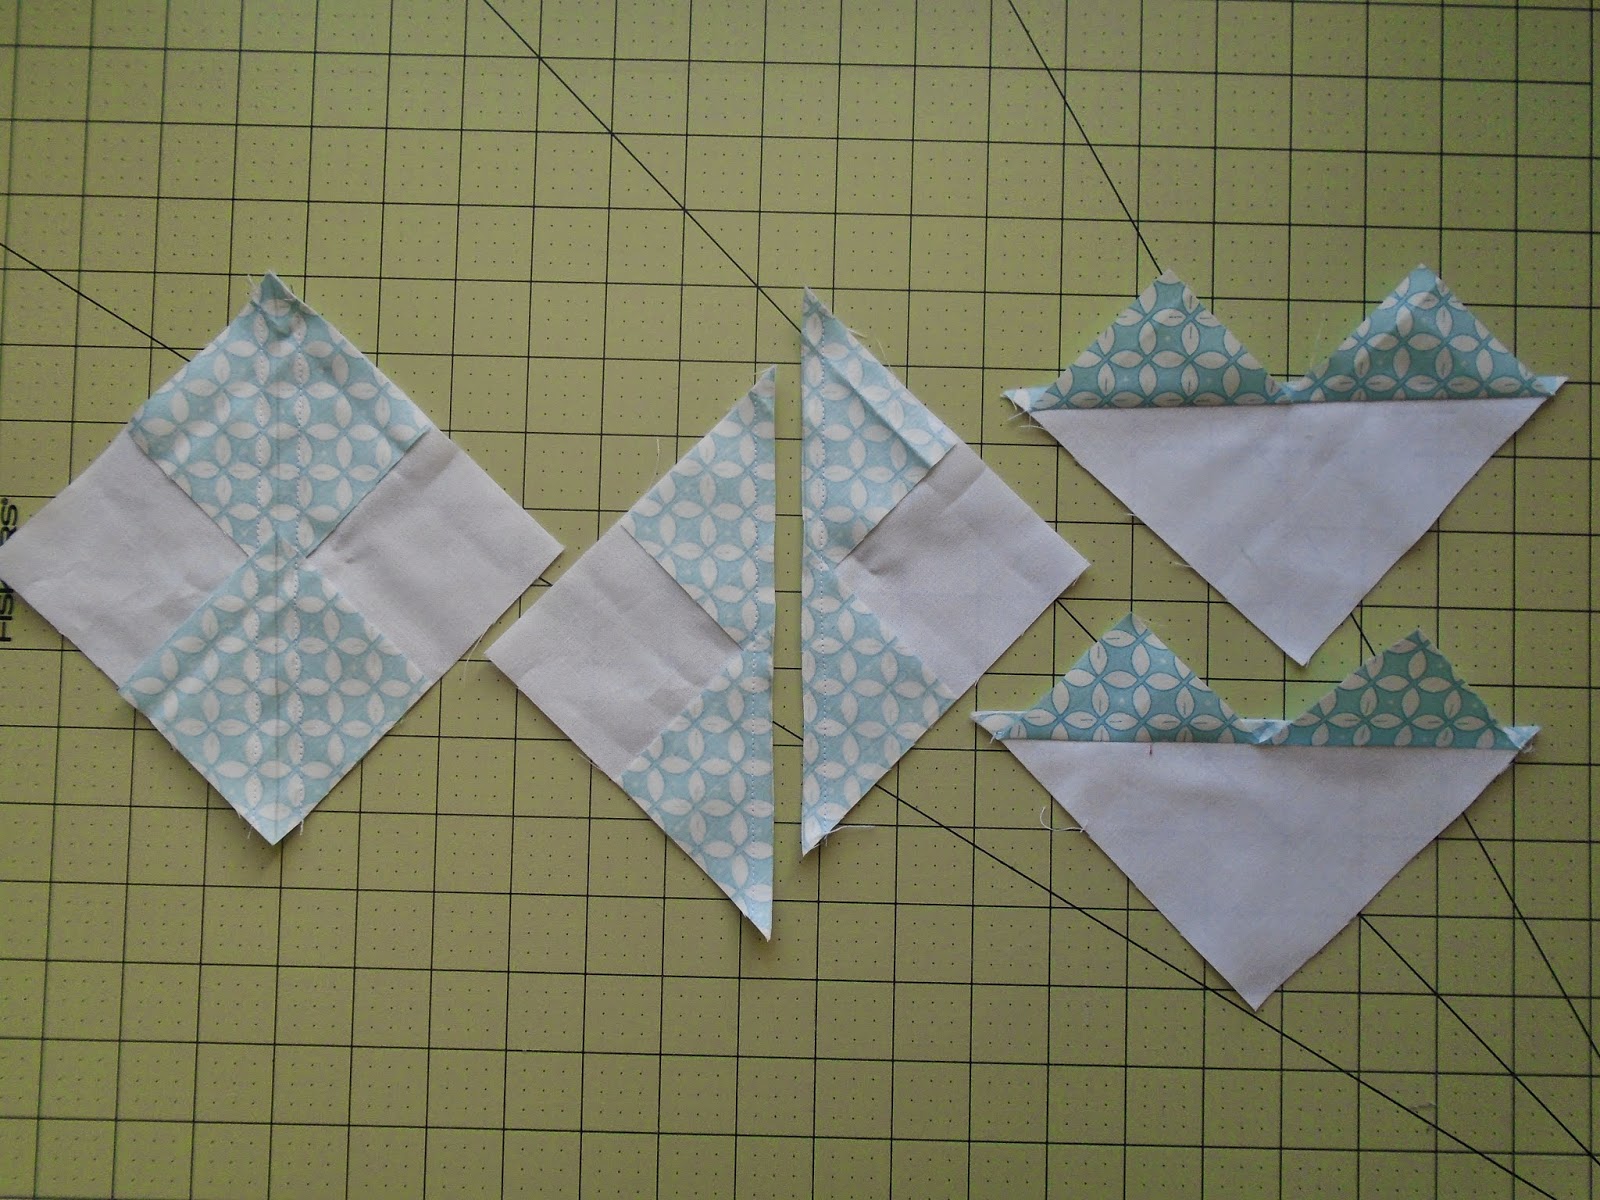
Using your 5 1/4 inch background squares and 2 7/8 inch squares, make fast flying geese units. You will need four (4) fast flying geese units per block. Draw diagonals on all of your 2 7/8 inch squares, align as shown below (2 per background square), sew 1/4 inch from each side of the line, and cut apart on the line. Press and repeat with remaining 2 7/8 inch squares. Make sure to trim off "dog ears!"


Lay out your block as shown below and sew together.


Here are all nine of my blocks:


For those of you making a twin sized quilt, remember that you will need to make a third 8" block row. I chose to make Dutch pinwheel blocks in nine different fabrics (instead of mixing up fabrics within the individual blocks).


Here are all three of my 8" block rows:


Sharing at Sew Cute Tuesday, Linky Tuesday, and Fabric Tuesday!

Here's your chance -- the link up to share your 8 inch blocks will be open until May 8th!