Showing posts with label update. Show all posts

Wednesday, January 13, 2021

Hello From The Other Side

Hello, it's me. It's been a long time, and maybe you remember that I used to sew and blog quite a bit. Things have been, um, quite different.

I'm going to go further back than necessary and say that 2020 was a year for me. I think it was a year for everyone, but being pregnant and having a baby during a pandemic was especially difficult. 

Despite the fact that I was at home more than ever, I sewed less than ever. I managed to do some quilting and mask making early on, but even that tapered off significantly once I moved my sewing space into the guest room and my sewing room became the nursery. (I do have two finished projects to post about, eventually.)

I did have a baby boy in October, so that was my main project for the year.


And since then, everything has been a blur. There were supposedly a bunch of holidays that have already come and gone. My idea that I could sew while the baby napped was a farce. My sweet grandmother passed away due to coronavirus complications without meeting my son. A flurry of family came to visit. My son is already three months old and doing all sorts of things that make me wish for time to slow down. I'm back to work (part time on site, part time work from home) and figuring out being a working mom. 


I'm not sure what's next but I still have all of those same unfinished projects hanging around, so maybe I should finally just work on those if I can ever figure out how to find time to sew again.

Friday, April 11, 2014

Scrappy String X Block Tutorial

If you've been around Little Bunny Quilts for a long time, you might remember one of the first quilts I blogged about -- my scrappy X quilt. I've finally put together an easy tutorial and patterns for this quilt using foundation piecing.

First, go to Craftsy and download the free pattern for the Scrappy String X Block and print the foundation pattern -- you'll need two foundation patterns for each block you make.

(Note 1/1/19: Craftsy is no longer hosting this free pattern. This post will be updated with a link to the free template as soon as we are able to find a new site to host our free patterns.)

Here's a picture of what the foundation pattern looks like printed out. If you want, you can trim down the paper to approximately 1/2 inch away from the solid line of the square.


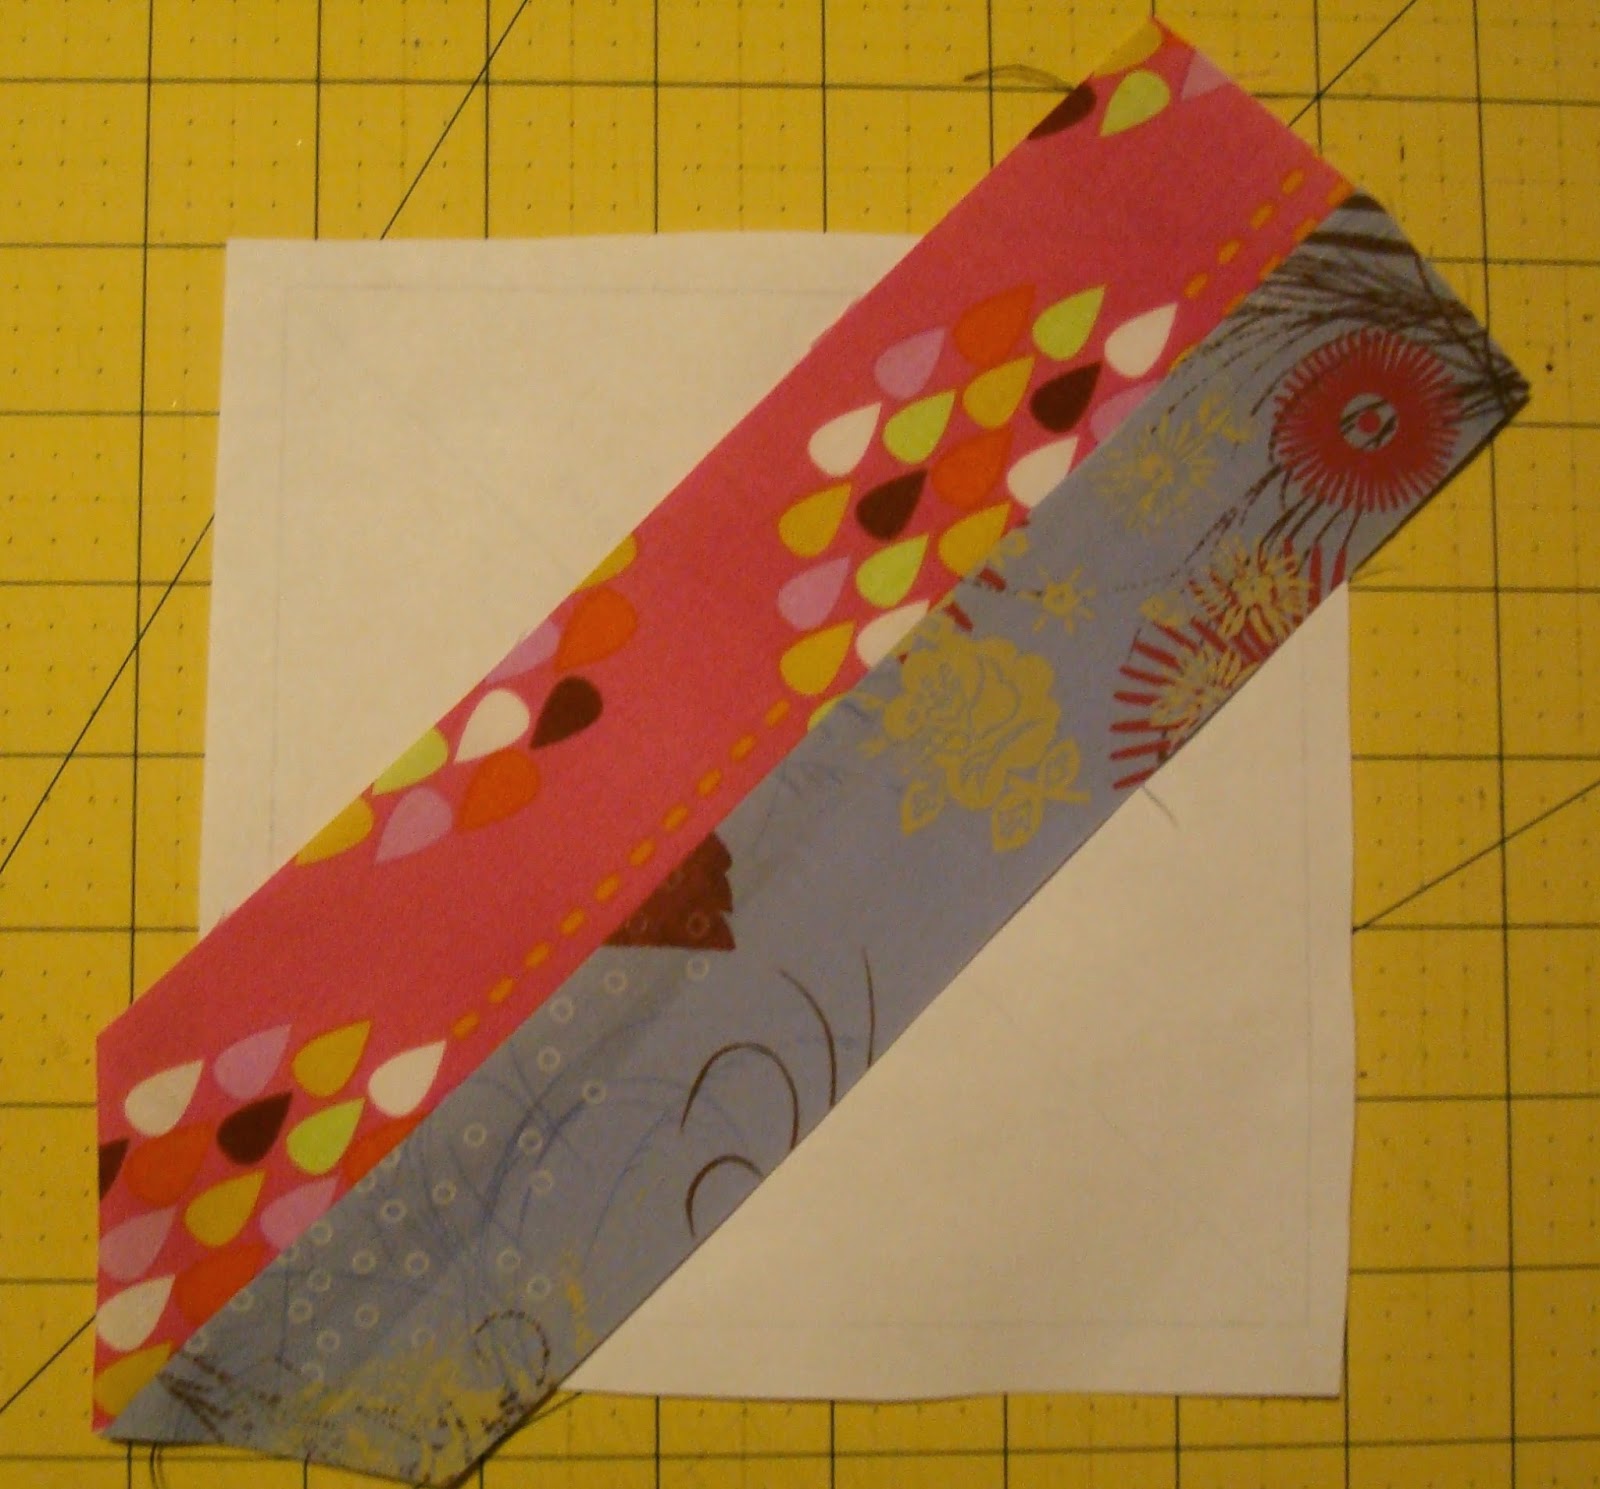
Using scraps long enough to span the entire square, pair two scraps right sides together and line up parallel to the line marked "line up fabric parallel to this line." Layer fabrics on the wrong side of the paper pattern so that you can see the square on the opposite side.


Sew 1/4 inch away from the edge of the fabric, sewing through both layers of fabric AND your paper foundation. A 1/4 inch foot is helpful here.


Press fabric to one side. Trim off excess if desired.


 Continue adding strips and scraps in the same way, sewing through both layers of fabric and the paper foundation, until you've covered your square.


Turn over and trim along the perimeter of the square. Your block should now be 6 inches square.


Using the diagonal line on the pattern, cut diagonally from corner to corner, perpendicularly to the direction that your fabric strips run. Remove paper foundation from your blocks.


For each X block you will need to make TWO scrappy squares.

Using your short 2" by 7" strips sew together pairs of string triangles as shown below. The right angle corners of the triangles should be sewn to the "inmost" end of the rectangle -- one on each side.


Using a 2" by 15" strip, sew together the units you assembled in the previous step. It is encouraged that you pin in the center so that your 2" by 7" strips line up with one another!!


Trim your block to 9.5 inches.


Ta da! You're finished with one block!

Here's my finished quilt top from way back when if you've never seen it!


The pattern we've written is for a throw with 30 of these blocks just like my original quilt, but this pattern is easily adaptable to both smaller and larger quilts, as well as a quilt without sashing!

Saturday, October 22, 2011

Teacup Quilt

I figured I would take the chance and show off my second quilt (the first one that was ever finished!), my teacup quilt (pattern from either Say It With Quilts or Quilts! Quilts! Quilts!, can't remember which)

{Update: for some reason, the picture of this quilt has disappeared. :( I will try to snap a new photo.)

The fabric for all of the teacups and saucers (well, 95% of them) came out of my mom's scrap bin. A number of them are fussy-cut to show off the fabric (like the cream and brown duck cup in the second to bottom row). There is one of Easter egg fabric, ones with snowmen, 1930s style florals, batiks, plaids, polka dots, and each one is of a different fabric.

This was my first foray into applique -- the handles are all hand appliqued on. The border fabric was also fussy cut to show off the full pattern on all of the sides.
.