Pages

Tuesday, October 30, 2018

The Border Quilt QAL {Friendship Stars}

It's a slightly delayed installment of the Border Quilt QAL! If you haven't joined in yet, there's still plenty of time -- check out all of the information on Patterns By Jen.


The last trip around the quilt added sawtooth stars, and this round adds friendship stars! This will be my last round of blocks for my version of the quilt.

After adding the spacer borders, I set to work on the friendship stars. As when I made my sawtooth stars, I separated my scraps into light and dark piles. I had a little marathon cutting session and cut the block parts for all 42 friendship stars. I pinned the parts for each block together to make it easy for me to work on a block or two at a time when I had a few extra minutes.


All of the block parts stacked up is nearly 8" tall! I even had to add in extra fabric -- I had to add in a light green print as an extra "light" fabric because I had used up so much of the light fabrics I had originally pulled for this project. I've been pretty busy outside the sewing room, so these have been very slow going.

However, my pre-cut blocks have made it very easy to pick up a set of block parts and work on one block at a time. Last week, the majority of my sewing time was the few minutes I had between getting home from work, starting dinner, and my husband getting home from work. Saturday I finished up the blocks and started laying out the blocks.


I ended up with a lot more blue stars than I had anticipated! I did my best to both mix up the block colors and block background colors so the same colors weren't too close to one another, while also making it look mostly random. This is a hard task! It was much easier to arrange the sawtooth star blocks because there were half as many!

My quilt top is now finished -- hooray! (Even if I had to move furniture and turn on every lamp in my living room this morning before work to take this picture!)


There are a couple stars with different centers from their star points -- this again was a "make it work" decision to stretch my fabric. I thought I would only have enough fabric to make the sawtooth stars and I ended up with enough to make the complete round of friendship stars with the help of one extra background fabric. I thought this was going to be a wall hanging (a large wall hanging!) but now it is most certainly throw sized. I'm not planning on adding any more to this quilt, but I could always change my mind!

Happy Tuesday! Sharing at Linky Tuesday and Let's Bee Social! And Needle and Thread Thursday too!

Wednesday, October 24, 2018

Christine's Blue Kitchen {Finished Quilt}

This weekend, I was able to quilt my blue Island Batik version of our Christine's Kitchen patternAs an Island Batik Ambassador, I am provided with samples of various lines of Island Batik fabrics to use and share with you!


For the quilting, I briefly considered using multiple thread colors but ultimately decided to use the same thread throughout. I used Connecting Threads 50 wt. in Silver.


Like my original Christine's Kitchen quilt, I did meanders in the background. In my original quilt, I did loops inside of all of the dishes, but this time around, I used a variety of simple free motion quilting motifs in the cups, vases, and pots. I did a lot of loops, swirls, and squiggles, but I tried to mix it up a little bit.


Working with the small spaces was a little limiting but other than the sugar and creamer pair on the bottom shelf, the rest of the dishes are all quilted differently.


The backing fabric is the larger floral print (used in the teapot above!) and the binding fabric is the speckle print (used in the coffee pot below!). I also used the floral print for the hanging sleeve. Because this quilt finishes at 36" x 39", you only need a single width of fabric for the backing!


I didn't do any quilting in the applique sections to help it stand out. For the border, I used a larger swirly flower filler.


I used one of my decorative stitches to stitch down the binding so it will be extra secure!


Originally I had planned to give this as a gift, but now I'm feeling a little selfish and might want to keep it. 


Don't forget to check out the Island Batik Facebook page to see what all of the other Ambassadors are working on this month!

Project Stats:
Name: Christine's Blue Kitchen
Pattern: Christine's Kitchen by HBD
Size: 36" x 39"
Fabrics: London Fog by Island Batik and grey solid
Quilting: Various motifs in grey thread from Connecting Threads
Future: Might be a gift, might not!

Sharing at Let's Bee SocialNeedle and Thread Thursday, and Brag About Your Beauties!

Monday, October 22, 2018

Baseball Baby Quilts {Tops for Twins}

After what was a momentary lull, I am back to having three baby quilts on my to-do list. The first two are the twin baseball-themed quilts using these fabrics:


I decided to use our new Boot Scootin' Baby pattern for these quilts. This is my first time using this pattern.

I also decided that I didn't need to be fancy with these quilts -- the two tops will be exactly the same.


The number one complaint (if you can even call it a complaint) that we seemed to get about the Ready, Set, Soar pattern is that it doesn't use 2.5" strips. Boot Scootin' Baby does use 2.5" strips so it does have that perk.

I did a lot of chain piecing over the weekend! I was about halfway done with the strip piecing when I snapped this picture.


A reminder -- when you're sewing strip sets, remember to sew with the same fabrics on top or bottom to reduce stretch and wonk! I always sewed with either the yellow or blue print on top and the white or red print on the bottom. My strip set ended up very straight and my selvages lined up well too!


I have both of the strip bases done but I only had time to slice and insert the applique background for one of the two quilts. The quilt is a little long because I used a full width of fabric for my strips instead of trimmed down strips. I'll trim the bottom before I do the quilting so that both quilts are the exact same size.


Now I have to decide what I'll use for the applique section. Part of me wants to move forward and simply add the applique sections and get these finished, but there's also part of me that wants to wait and add the names of the boys once they are born. But that delays quilting, binding, and mailing so I'm going back and forth on what to do.

Happy Monday! Sharing at Linky Tuesday!

Wednesday, October 17, 2018

Christine's Kitchen 2.0 {Finished Quilt Top}

My Chrstine's Kitchen top -- version 2.0! -- is now ready for quilting!

I sewed together the three out of four of the rows of blocks right away. The last remaining row is the row containing the two flower blocks which stick out of the vases.


For my two applique blocks, I decided to make white daisies with blue centers. I made my flowers larger than the applique templates in the pattern, so I made two flowers for each block instead of three for each block. These fabrics, as well as the green stems and leaves, came out of my stash of Island Batik scraps. As an Island Batik Ambassador, I am provided with samples of various lines of Island Batik fabrics to use and share with you!


For the machine applique, I used a blanket stitch around my flowers, stems, and leaves. For the leaves, I used a dark olive green Aurifil thread. For the flower centers and petals, I used a navy blue thread. I used a wider stitch width for the petals and a narrower stitch width for the centers.


After adding the applique blocks to the second row, I added the set of sashings that are added before the pieced border.


Instead of using the background fabric in the pieced border, I decided to alternate between the light and dark colors from the strip pack. I had to cut down the strips from 2.5" to 2", but strip piecing the pieced border was a very quick process. I was able to use up the scraps I had from paper piecing and I think I used about 10 different fabrics in the pieced border.


I'll be using the remainders of my two blue yardages for the backing, binding, and hanging sleeve. This is the next top that I'll be quilting -- I have a batting from Hobbs that was provided in my July Island Batik Ambassador box that I'll be using. I am leaning towards quilting this one with grey thread and I have a few different grey options.

Happy Wednesday!

Sharing at Let's Bee Social and Needle and Thread Thursday!

Monday, October 15, 2018

Radiant Jewel {Starry Night}

When last I posted about my Radiant Jewel quilt, I was in the midst of making all of the four patches for the star blocks and pieced border.


Once I was able to finish all of the four patches, I started working on my eighteen star blocks. These went together relatively quickly and were easy to work on for a few minutes here and there. I think these came out really lovely and I am happy I decided to make all of the large center four patches the same for these blocks.


I also have all of the pieced border units to put together. My next task is to do the background fabric cutting necessary to complete the pieced borders and to make the 20 or so HSTs for the pieced border units. 

This will be set aside momentarily to work on some baby quilts and finish my Island Batik project for October. I have quite a bit of quilting to do over the next few weeks -- I quilted some secret sewing this weekend for the test baby quilt I made while on retreat. Here's the backing:


Happy Monday! Don't forget to enter to win some Island Batik fabric -- the giveaway will close on Friday!

Sharing at Main Crush Monday and Linky Tuesday!

Friday, October 12, 2018

Twinkle Pattern -- Now Available! {HBD Pattern Premiere + Giveaway}

I'm so excited to share that our Twinkle pattern is now (finally!) available! A twist on the classic friendship star block, Twinkle uses a nested star design to create a modern star quilt.


I had originally made this quilt last winter for our Island Batik Ambassador hop. This uses the Mountain's Majesty line.


While working on finalizing this pattern, I also made a baby size version of the quilt that is also included in the pattern. I used the Paisley Dot collection for this quilt.


This pattern is now available on Etsy and PayHip!! The pattern includes the directions for three sizes. The baby size version which finishes at 42" x 36" and the throw size version which finishes at 72" x 54". The pattern also includes a twin sized option which adds two borders to the throw size quilt; the twin version will finish at 88" x 70". Here's the twin-sized diagram:


This sparkling quilt pattern is deceptively simple and is perfect for layer cakes and fat quarter bundles. You can actually make all of the blocks for the twin or throw size version from a single layer cake and background fabric!

In celebration of today's pattern premiere, I'll be giving away the last sixteen 10" squares from my Paisley Dot stacker, which I used to make the baby size version of this quilt.


Two entry options:
1. For everyone -- leave a comment with what fabric line or colors you would use to make your own version of Twinkle.
2. If you've made a version of *any* Honey, Bunny, and Doll pattern or quilt along, send me an email (littlebunnyquilts@gmail.com) with a photo of your project for a second entry.

The giveaway will close on Friday, October 19th!

Update: Scottylover aka Sandy is our winner! 


I can't wait to see your version of this fun and easy pattern! Share your pictures on Instagram with the hashtags #HBDpatterns and #TwinkleQuilt! Join the Honey, Bunny, and Doll Facebook Group to be a part of the inner circle to know about pattern premieres and quilt alongs first!

Wednesday, October 10, 2018

The Border Quilt QAL {Sawtooth Stars}

My quilt is growing at a rapid pace! Check out the information about The Border Quilt QAL here!


This "round" of blocks is sawtooth stars! Here's my quilt with all of the stars added:


Since I'm working from scraps and not from yardage, I thought I would share a little more in detail about the process I use to make scrappy yet coordinated blocks for this section of the quilt.

First and foremost, I separated my scraps into one pile of lights and light-mediums and a second pile of darks and dark-mediums for my backgrounds and stars, respectively. From these piles, I sorted the fabrics by size to make sure I had enough of a fabric to make a full block (or two or three or four!). Most of my blocks were made in pairs and all of the blocks but the red star blocks in the corners have the same fabric throughout the block. 

I also employed multiple techniques to make the flying geese based on the sizes of my scraps. For many, I had fabric wide enough to use the fast flying geese technique. For others, my scraps weren't wide enough so I used the stitch and flip technique. Even though the stitch and flip technique isn't my favorite, it allowed me to make use of a wider variety of scraps. 

Originally, my plan was to quit after my "round" of stars, but I have plenty (PLENTY!) of scraps for the next round of the quilt -- friendship stars! I still need to add my next round of solid fabric as the spacer border, but I will do that when I start my friendship stars next week. I think I only have enough Kona Champagne for one more spacer border!

Happy Wednesday!

Sharing at Needle and Thread Thursday Let's Bee Social, And Oh Scrap!

Monday, October 8, 2018

Christmas Countdown {78 Sewing Days Left!}

There are 78 sewing days left until Christmas! Today I've put together a helpful compilation of a bunch of *free* tutorials for Christmas and holiday themed projects! As always, any pattern is a holiday pattern if you use holiday-themed fabric -- let your imagination go wild!

Jingle Bell Rock Throw Quilt from Moda Bake Shop:
This one is my latest MBS pattern! I've seen a few in-progress versions of this quilt and I can't wait to see more!


Rail Fence Table Runner:
The perfect pattern for those leftover 2.5" strips or for a quick and easy gift!


Frosty Cabins Table Runner from Modern By The Yard:
This is one that I'm actually planning to make another version of sometime this winter!


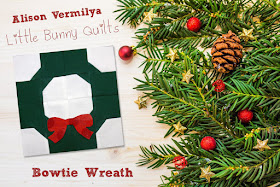
Bowtie Wreath and Countdown to Christmas 6" blocks from Moda Bake Shop:
Be creative and come up with your own setting for the entire collection of 6" blocks from last December's block-a-day "Advent calendar" on MBS!


Star of Wonder Table Runner:
Another simple table runner that's perfect for gifting!


Sparkle Tree Skirt:
This tutorial would work with any 6" finished block swapped out for the Ohio Star blocks!


Ribbon Candy on Moda Bake Shop:
If you're feeling festive, this is the quilt to try! Amanda designed and made this quilt and I have it on my bucket list to make myself.


As always, if you make something from one of our tutorials be sure to share a picture with us!

Happy Monday!

Friday, October 5, 2018

Of Borders and Babies {Shopping Spree}

It's the last quarter of the year, and that means it's time to focus on finishes, finishes, and more finishes so that there just might be the possibility that I could end the year with less than 15 WIPs. I'm also itching to get some quilts out of my house, either by gift or by sale, so I have fewer to move when we manage to buy a house.

So the logical thing for me to do was to go fabric shopping, right? Right -- because everything I bought (well, nearly everything) has been for finishing projects!

I have complained to a number of people recently that I have given seven baby girl quilts in a row and we've had no baby boys in our circle since a coworker had a boy over two years ago! Well ask and ye shall receive -- friends are having TWIN boys later this year. And of course, my already-made, ready-to-gift quilts won't work! So I'll be making matching baseball themed baby quilts out of this adorable Peanuts fabric:


My plan is to use our Ready, Set, Soar! pattern to make matching quilts with baseball appliques. I might use different colors for the bindings and backings. 

I also recently learned that a new to me quilt shop moved into my town and this past weekend was their big pre-quilt market sale! I had a lovely time visiting Charlotte's Cottage quilt shop, chatting with the owner, and picking out border fabric for not one, but two quilts!

I picked out the burgundy floral for my Double Delight quilt. The blue geometric print will be the final border on my Drift Away quilt.


I also might have just picked up a few things on sale just for stashing...


When I put the flower pot print in my cart, I had no idea how large the print was! I have a larger cut of this -- 1.25 yards -- so it might get used for a backing of some sort.

Happy Friday to you! No finishes here this week, but feeling a little bit accomplished with projects I can't share yet! 

Wednesday, October 3, 2018

Needle, Paper, Scissors {Paper Piecing with Island Batik!}

As an Island Batik Ambassador, I am provided with samples of various lines of Island Batik fabrics to use and share with you!


If you've followed me for any length of time, you know that I absolutely LOVE foundation paper piecing! I've been looking forward to this challenge since we got our project calendar all the way back in January.

When we got our July shipments, I decided that I wanted to use the London Fog fabrics to make a new version of our Christine's Kitchen pattern. This pattern was our 2017 QAL -- when I made my original version, I also used Island Batik fabrics in greens with a cream background.


This time around, I pulled out the yardage and strip pack of London Fog and decided to use a grey solid for my background.


This is one of the projects that I started while I was at quilt camp in August. I used the larger cuts of two different fabrics from the line for the piecing of the larger pieces and used the dark strips for the accents in each block. Here are the first three blocks that I made:


For the largest blocks, I made half with the floral print and half with the speckled print. For the smaller blocks and the center coffee pot, I used just the 2.5" strips for the piecing. This meant that for a few of the blocks I had to get creative in piecing the blocks -- like for the sugar bowl and creamer where I made them look "dip dyed" instead of just one color for the majority of the block.


Here are most of my paper pieced blocks for this project all laid out together:


Next up will be making the applique flower blocks and then putting the whole quilt top together. I cut all of the background setting pieces before I started the blocks, so putting together the top will be quite quick!

Interested in the Christine's Kitchen pattern but scared to commit? We have a two block preview that is free on our Craftsy site! The preview only contains the pattern for one teacup and one coffee pot and has no setting directions, but is a good way to practice paper piecing with scraps until you're undertake the full pattern!